HiTechnic SuperPro Experimenter’s Kit A-SP
$64.95
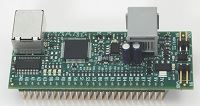
Build electronic circuits and develop NXT control programs with the new HiTechnic SuperPro Experimenter’s Kit. The Experimenter’s Kit Handbook contains detailed step-by-step instructions to build electronic circuits and custom sensors. All items you need are included in the Experimenter’s Kit including a comprehensive set of electronic components, a HiTechnic SuperPro Prototype board, a solderless breadboard, and a jumper connector set. Programming is made easy with sample programs for NXT-G, LabVIEW, NXC, and RobotC.
Note: This version of the Experimenters’ Kit comes with the new SuperPro prototype board.
Out of stock
Description

Experiment 5 – Ambient Canceling Light Sensor
This experiment uses the layout built-in Experiment 4 and adds to the design by creating a light sensor that measures and cancels out the background light level.
Additional Parts
Part | Quantity | Notes |
220 Ohm resistor | 1 | Red – red –brown – gold |
4.7K Ohm resistor | 2 | Yellow – violet – red – gold |
LED | 1 | high brightness (clear dome) |
Transistor | 1 | 2N3904 |
Photocell | 1 |
Insert the 220 Ohm resistor to connect to 4V and the lower breadboard section as shown.
Insert one 4.7K Ohm resistor to connect B0 and the lower section of the breadboard and the other between GND and A0.
Insert the high brightness LED making sure the LED body flat or notch faces toward the left of the layout diagram. Note that the LED leads should be used full length.
Insert the transistor making sure it is around the right way, with the flat side facing toward the bottom of the diagram.
Insert the photocell as shown. It does not matter which way around the photocell is inserted.
Using the color-coded jumper wires, complete the circuit as shown.

Circuit Diagram

Programming
Load the program Exp5 AC Light.rbt. Ensure the SuperPro board is connected to sensor port 1 of your NXT.
The program turns the LED on and off and measures the light level for both conditions. It then subtracts the reading obtained with the LED off from the reading obtained with the LED on and displays that value. If there is nothing placed above the LED – photocell sensor head, these readings will be very similar. However, if a white object or surface is placed a few centimeters above the sensor head, the two readings will start to differ because the white surface reflects the light from the LED when it is on. This provides a good way to detect the presence or absence of an object.
You can experiment to see how different colored and different sized objects affect the results.
Additional information
| Weight | .5555 lbs |
|---|---|
| Dimensions | 8.5 × 6.5 × 1.5 in |
Robot C
The RobotC driver suite supports HiTechnic products for RobotC 4.x and RobotC 3.x. Select the corresponding repository at the link below and download the zip file.