Powered by Modern Robotics

0 $0.00

Cart

No products in the cart.
Shop

HiTechnic NXT Angle Sensor

$26.95

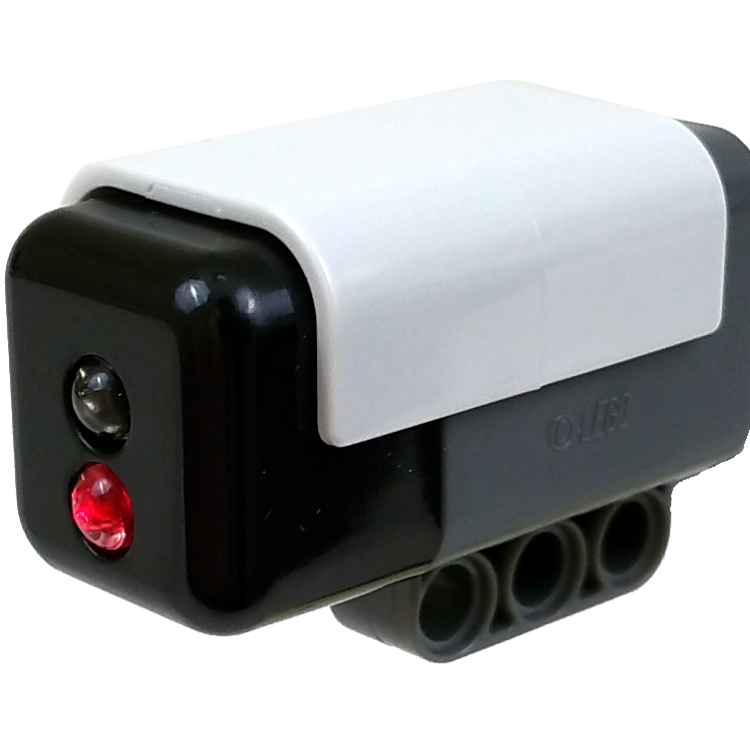
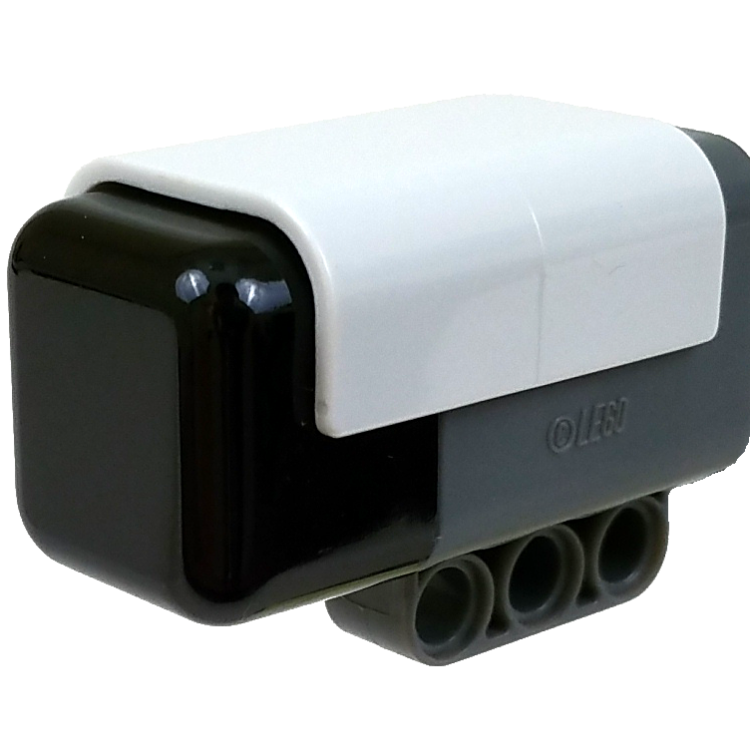
Measure axle rotation position and rotation speed with the HiTechnic Angle Sensor. The Angle Sensor enables you to measure three rotation properties:

  • Absolute Angle – the rotation position of a rotating axle from 0 – 359 degrees with 1 degree accuracy
  • Accumulated angle – the accumulated number of degrees an axle has rotated
  • Rotation Speed – the speed of the axle rotation in RPM (revolutions per minute)

With its very low friction mechanism, the HiTechnic Angle Sensor is ideal for building models where accurate measurement of rotation properties of an axle is key. Perfect for building a distance measuring wheel or a weather station wind vane.

Out of stock

Join the waitlist to be emailed when this product becomes available

SKU: NAA1030 Category:

Description

HiTechnic NXT Angle Sensor for LEGO Mindstorms NXT

Introduction

The HiTechnic Angle Sensor connects to a standard LEGO Technic cross axle and measures three rotation propertied of an axle. These are

  • Absolute Angle: the rotation angle of an axle from 0 degrees to 359 degrees, accurate to 1 degree.
  • Accumulated Angle: the accumulated multiple rotation angles measured since the last reset function was performed.
  • Revolutions per Minute (RPM): the current estimate of rotation rate from 1 RPM up to 1,000 RPM.

The Angle sensor is ideal for building into complex models were monitoring the shaft angle or location and/or the speed of rotation is desired.

Programming

Mindstorms NXT-G

Angle Sensor Block

This block measures three rotation propertied of an axle. These are

  • Absolute Angle: the rotation angle of an axle from 0 degrees to 359 degrees.
  • Accumulated Angle: the accumulated multiple rotation angles measured since the last reset function was performed.
  • Revolutions per Minute (RPM): the current estimate of rotation rate from 1 RPM up to 1,000 RPM.

Using data wires, it can send out the current angle of rotation and a logic signal (true/false) based on whether the current heading falls inside or outside a trigger range.

A trigger range consists of upper and lower limit values in a range of numbers where a change in the reading results in the condition of being either inside or outside the range. For example, you might program your robot to rotate an axle to a set position so you could set the trigger range to be from 179 to 182. As long as your robot rotates the axel to a point between these two numbers, the condition will be true.

Specify the trigger points by using the slider or by typing the values into the input boxes. To specify the portion of the axle angle range (inside or outside the trigger range) that will generate the “true” signal, use the pull-down menu. The “true” portion of the range will be in color; the “false” portion will be gray.

The default setting for the Angle sensor block is for angles that are greater than 90 degrees and less than 270 degrees to generate a “true” signal. The compare function above the range allows you to switch the “true” portion of the range to be either inside or outside the range selected.

You must drag at least one output data wire from this block’s data hub to another block for any information to be sent.

Display Settings
  1. The number shows which of your NXT’s ports are connected to the Angle sensor. You can change this number in the configuration panel if you need to.
  2. The block’s data hub will open automatically when the block is placed in the work area. At least one data wire must be dragged from the block’s output plug to another block’s data hub. The trigger range and other features can be set dynamically by connecting an input data wire. (See the Data Hub section below for more information.)
Configuring the Angle Sensor Block

The sensor may be connected directly to an NXT sensor port or via the HiTechnic Sensor Multiplexer (MUX). When configuring the sensor via the multiplexer, there are two-port selections to make. The first is the NXT to MUX connection and the second, the MUX to SENSOR connection.

Connecting Directly to the NXT

When connecting the sensor directly to the NXT, choose the port the sensor is connected to.

Connecting via the HiTechnic Sensor Multiplexer

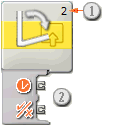
To connect the sensor via the multiplexer, click the right arrow symbol  to display the port options.


Click the checkbox to select that the sensor will be connected vial the MUX. Configure the MUX to Sensor connection by selecting the MUX port (1 – 4) that is connected to the sensor.

Click on the right arrow symbol again,  to display the NXT to MUX port selection.


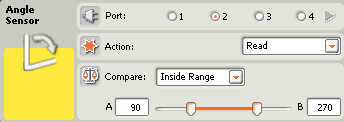
Select the NXT port that is connected to the Sensor Multiplexer.

Configuring Action and Compare

Select Read to read the output values from the sensor.

Select Calibrate to set the current axle position to the 0-degree position.

Select Reset to reset the accumulated count to 0.

If you choose the Compare function Inside Range above the slider, the block will be triggered when the angle is between the two trigger values; select Outside Range to trigger the block when the heading is outside the two trigger values. Use the slider to set the trigger values or type them directly into the input boxes (0–359).

Angle Sensor block Data Hub plugs
  1. This plug wires the number for which of your NXT’s ports are connected to the compass sensor.
  2. This plug wires the Angle output.
  3. This plug wires the RPM output.
  4. This plug wires the Accumulated angle output.
  5. This plug wires the Action input, 0 = Read, 1 = Calibrate, 2 = Reset.
  6. This plug wires the Range selection for inside/outside range function, 0 = Inside Range, 1 = Outside Range.
  7. This plug wires the lower range limit number for the Inside/Outside compare function.
  8. This plug wires the upper range limit number for the Inside/Outside compare function.
  9. This plug outputs the Inside/Outside logical value.
  10. This plug is set to true if the sensor is connected via the HiTechnic sensor multiplexer.
  11. this plug wires the number of the multiplexer port connected to the sensor.
Sensor Register Layout
AddressTypeContents
41Hbytemode control
42Hbytethe angle in 2-degree increments
43Hbyte1-degree angle adder
44HlongAccumulated Angle
48HintRPM – Rotations Per Minute

Set mode control to 43H to Calibrate sensor or to 52H to reset accumulated angle. When Calibrating the sensor at least 25ms Wait should be used before further reads from the sensor. This time is needed to burn the new zero position into EEPROM memory on the sensor. Once calibrated, the sensor will retain the new zero position even when power cycled. The Accumulated angle, on the other hand, is lost when the sensor is power cycled.

Other Programming Environments

RobotC

All features of the HiTechnic Angle Sensor can be accessed using RobotC. The RobotC drivers pack that is available on this download page will include drivers for this sensor.

NXC

NXC is a C-like programming language that can access all the features of this sensor.
For more information go to http://bricxcc.sourceforge.net/nbc/.

Example NXC Code

//=====================================================================
// HiTechnic - Angle Sensor Sample Program
//
#define ANGLE S1
//=====================================================================
// ReadSensorHTAngle(port, Angle, AccAngle, RPM)
// Reads the HiTechnic Angle Sensor and returns the current:
//   Angle              degrees (0-359)
//   Accumulated Angle  degrees (-2147483648 to 2147483647)
//   RPM                rotations per minute (-1000 to 1000)
void ReadSensorHTAngle(int port, int &Angle, long &AccAngle, int &RPM)
{
  int count;
  byte cmndbuf[] = {0x02, 0x42};  // I2C device, register address
  byte respbuf[];                 // Response Buffer
  bool fSuccess;
  count=8;                        // 8 bytes to read
  fSuccess = I2CBytes(port, cmndbuf, count, respbuf);
  if (fSuccess) {
    Angle = respbuf[0]*2 + respbuf[1];
    AccAngle = respbuf[2]*0x1000000 + respbuf[3]*0x10000+
               respbuf[4]*0x100 + respbuf[5];
    RPM = respbuf[6]*0x100 + respbuf[7];
  } else {
    // No data from sensor
    Angle = 0; AccAngle = 0; RPM = 0;
  }
}

// ReserSensorHTAnalog(port, resetmode)
// resetmode:
//   HTANGLE_MODE_CALIBRATE  Calibrate the zero position of angle.
//                           Zero position is saved in EEPROM on sensor.
//   HTANGLE_MODE_RESET      Reset the rotation count of accumulated.
//                           angle to zero.  Not saved in EEPORM.
#define HTANGLE_MODE_CALIBRATE              0x43
#define HTANGLE_MODE_RESET                  0x52
void ResetSensorHTAngle(int port, int resetmode)
{
  int count;
  byte cmndbuf[] = {0x02, 0x41, 0}; // I2C device, register address
  byte respbuf[];                   // buffer for inbound I2C response
  cmndbuf[2] = resetmode;           // Set reset code
  count=0;                          // 0 bytes to read
  I2CBytes(port, cmndbuf, count, respbuf);
  if (resetmode == HTANGLE_MODE_CALIBRATE)
     Wait(50);  // Time to allow burning EEPROM
}
//=====================================================================
task main()
{
  int angle;
  long acc_angle;
  int rpm;

  SetSensorLowspeed(ANGLE);
  Wait(100);

  TextOut(0, LCD_LINE1, "HiTechnic");
  TextOut(0, LCD_LINE2, "  Angle Sensor");
  TextOut(0, LCD_LINE8, "");

  while(true) {
    Wait(100);

    ReadSensorHTAngle(ANGLE, angle, acc_angle, rpm);
    TextOut(0, LCD_LINE4, "Angle :         ");
    NumOut(7*6, LCD_LINE4, angle);

    TextOut(0, LCD_LINE5, "AccAng:         ");
    NumOut(7*6, LCD_LINE5, acc_angle);

    TextOut(0, LCD_LINE6, "RPM   :         ");
    NumOut(7*6, LCD_LINE6, rpm);

    if (ButtonPressed(BTNLEFT,0)) {
      while(ButtonPressed(BTNLEFT,0));
      ResetSensorHTAngle(ANGLE, HTANGLE_MODE_RESET);
    }
    if (ButtonPressed(BTNRIGHT,0)) {
      while(ButtonPressed(BTNRIGHT,0));
      ResetSensorHTAngle(ANGLE, HTANGLE_MODE_CALIBRATE);
    }
  }
}

Additional information

Weight .0625 lbs
Dimensions 2 × 3 × 1.25 in

Robot C

The RobotC driver suite supports HiTechnic products for RobotC 4.x and RobotC 3.x. Select the corresponding repository at the link below and download the zip file.

https://github.com/botbench

Downloads

No downloads found!