HiTechnic NXT Compass Sensor – No longer available!
$0.00
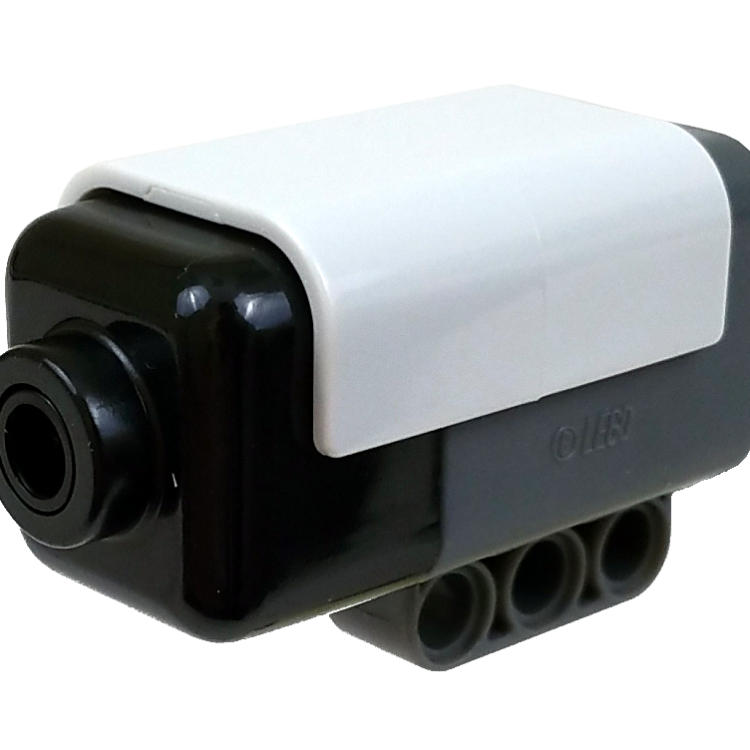
Expand your NXT experiences with the new NXT Compass Sensor and add accurate navigation to your Mindstorms® NXT projects. The NXT Compass Sensor is a digital compass that measures the earth’s magnetic field and outputs a value representing the current heading. The magnetic heading is calculated to the nearest 1° and returned as a number from 0 to 359. The NXT Magnetic Compass Sensor updates the heading 100 times per second. The Compass Sensor operates in two modes, Read mode and Calibrate mode. In Read mode, the current heading is calculated and returned each time to the NXT program executes a read command. In Calibrate mode the compass can be calibrated to compensate for externally generated magnetic field anomalies such as those that surround motors and batteries, thereby maintaining maximum accuracy.
NOTE: The HiTechnic Compass sensor has been withdrawn from the catalog and is no longer available.
Out of stock
Description

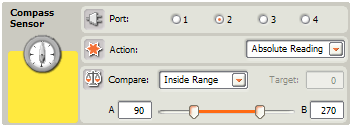
Compare
Compares the Absolute Heading to the range set and sets the logic value to show if the value is inside or outside the range.
See Using Range below for more information.
Using Relative Reading
Relative Reading makes it easy to stay on a selected heading. To use this feature select the Relative Reading action. Then enter a Target that is the heading you wish to maintain.
If you wanted to navigate South, you would enter a Target of 180 (South is 180 degrees). The Compass Sensor block would then calculate the difference between the Absolute Heading and your Target and return the difference as the Relative Heading. (plug 7).
For example, with your target set to 180, if the Absolute Heading were 175, then the Relative Heading would be 5 (Target – Absolute Heading or 180 – 175 = 5). This indicates a turn to the right or clockwise of 5 degrees is required to get back to the Target.
If the Absolute Heading were 185, then the Relative Heading would be -5 (Target – Absolute Heading or 180 – 185 = -5). This indicates a turn to the left or clockwise of 5 degrees is required to get back to the Target.
Calibrating the Compass Sensor
The HiTechnic compass sensor will be influenced by local magnetic interference in the same way as any other magnetic compass. Objects such as metal items, motors, batteries, and wires can cause magnetic interference. Local magnetic interference may cause the compass to output heading several degrees different than the actual magnetic heading. This is called compass deviation. To correct for deviation, the HiTechnic compass sensor has a built-in calibration function that calculates correction offsets and stores them in the compass.
Calibration is optional and usually not required for normal operation. To minimize the need for calibration make sure you mount the compass at least 4 – 6 inches (10 – 15 cm) away from the NXT and NXT motors.
To calibrate the compass under program control, select calibration mode (value 2 wired to the Action plug input) and then program your robot to rotate (turn in a tight circle) between 1 ½ and 2 times (more than 360 degrees) so it completes a full turn in about 20 seconds. Once the turns have been completed, set the Action to a Read function (Absolute or Relative) and the compass will be calibrated. The compass will retain the calibration settings until another calibration is performed, even if it is unplugged.
Using Range
Compare lets you set a range and easily determine if you are inside or outside the range.
The Components for using the Range function are;
Inside Range / Outside Range: Select if you want to test for an Absolute Heading inside the range or outside the range.
A: The lower limit of the range (0 – 359)
B: The upper limit of the range (0 – 359)
To use the Range function, set the lower and upper limit of your range and whether you want to test for inside or outside the range.
Examples showing the logical result.
A | B | Range | Absolute Heading | Logical Value |
85 | 95 | Inside Range | 90 | |
85 | 95 | Inside Range | 100 | |
85 | 95 | Outside Range | 90 | |
85 | 95 | Outside Range | 100 |
Sensor Register Layout
Address | Type | Contents |
00 – 07H | chars | Sensor version number |
08 – 0FH | chars | Manufacturer |
10 – 17H | chars | Sensor type |
18 – 3DH | bytes | Not used |
3E, 3FH | chars | Reserved |
40H | byte | Not used |
41H | byte | Mode control |
42H | byte | Heading } two-degree heading |
43H | byte | Heading } one-degree adder |
44, 45H | word | Heading (low byte, high byte) |
46 – 7FH | bytes | Not used |
The Sensor version number field will report a revision number in the format “²Vn.m” where n is the major version number and m is the revision level. Revision numbers will typically reflect the firmware level. The version number will be used to indicate the hardware level.
The Manufacturer field will contain “HiTechnc”.
The Sensor type field will contain “Compass”.
The Mode control field may be set to 0x00 or 0x43 to define measurement mode or hard-iron calibrate mode.
The Heading fields will return the currently measured heading during measurement mode operation. During hard-iron calibrate mode operation, this field will jam.
The heading is obtained by reading location 0x42 to obtain the two-degree heading and 0x43 to obtain the one-degree adder. The heading can then be computed as
Heading = (two degree heading *2) + one degree adder.
If the sign is a problem, then the conventional 16-bit value can be obtained from 0x44 (low byte) and 0x45 (high byte).
Locn 0x41 is the mode control. Defaults to 0, which is the measurement mode. Change to 0x43 to set calibration mode. Must be changed back to 0 when calibration is completed. (If cal. fails, locn. 0x41 will be set to 2 after the host has set it to 0 at the end of the failed to calibrate attempt.)
Other Programming Environments
RobotC
All features of the HiTechnic Compass can be accessed using RobotC. For more information go to http://www-education.rec.ri.cmu.edu/robotc/.
NBC
Next Byte Code (NBC) is a simple programming language that can access all compass features. For more information go to http://bricxcc.sourceforge.net/nbc/.
Notes:
- The HiTechnic compass sensor will only operate correctly in a horizontal plane so you must keep the compass level for it to read correctly. This is very important so remember this when you build it into your robot.
- NXT Firmware version 1.03 must be loaded in the NXT for the compass to operate correctly. You can check the firmware version by displaying the NXT Window in the Mindstorms software.
- It is highly desirable to mount the compass at least 6 inches (15 cm) away from the motors and 4 inches (10cm) away from the NXT brick itself.
- Try to make sure it is firmly mounted, if it bounces around, the readings may bounce around too.
Additional information
| Weight | .0370 lbs |
|---|---|
| Dimensions | 2 × 3 × 1.25 in |
Robot C
The RobotC driver suite supports HiTechnic products for RobotC 4.x and RobotC 3.x. Select the corresponding repository at the link below and download the zip file.