Powered by Modern Robotics

0 $0.00

Cart

No products in the cart.
Shop

HiTechnic NXT PIR Sensor

$19.95

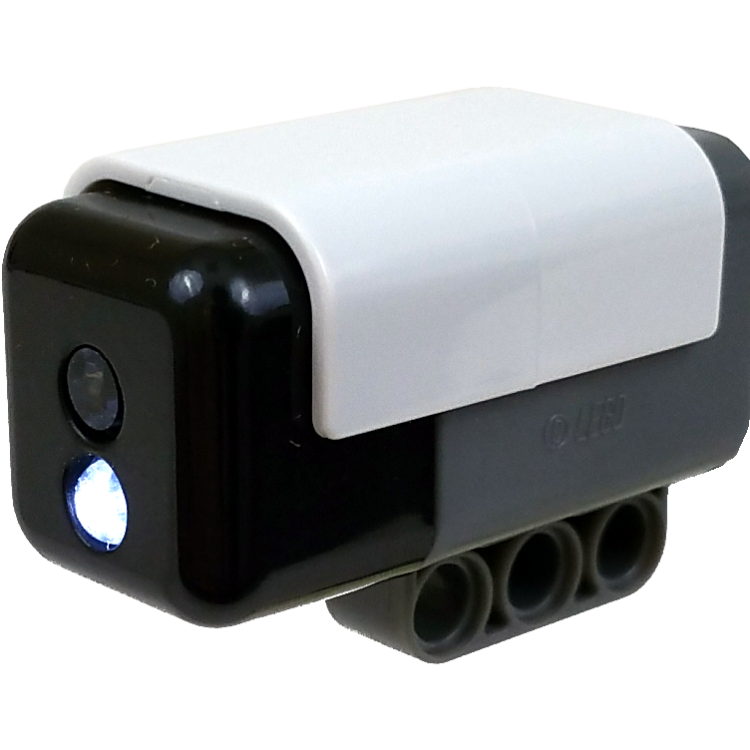
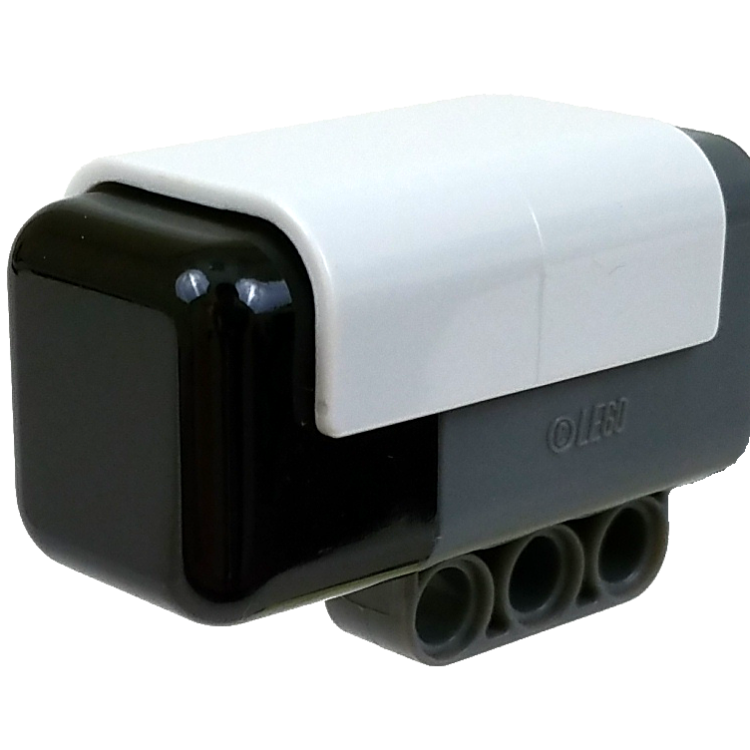
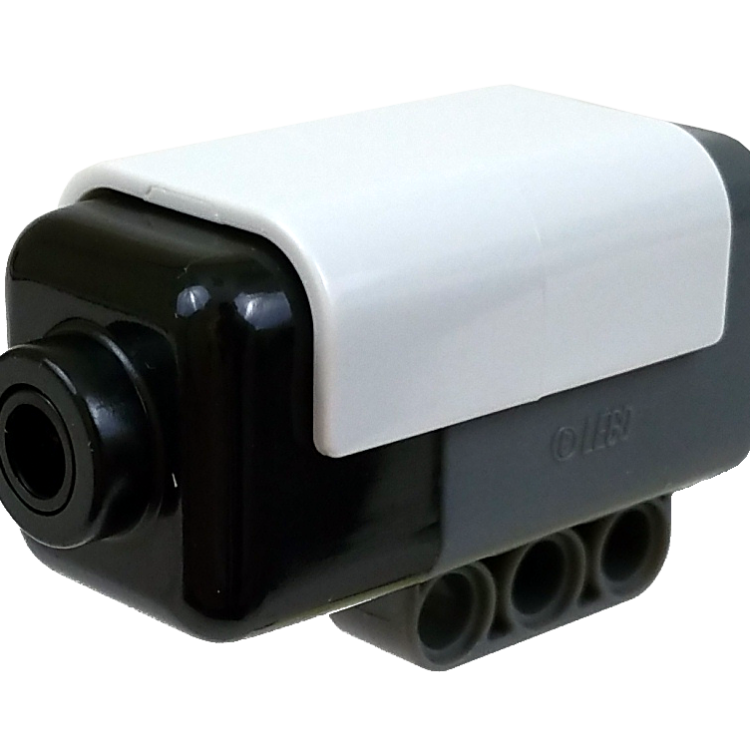
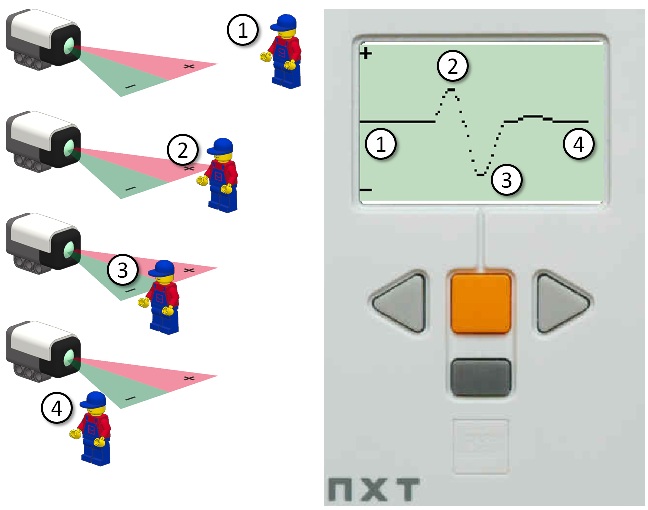
Detect people or pets with the HiTechnic PIR Sensor. This Passive Infrared Sensor is similar to the sensors used on security lights that turn on when people or animals move in front of them. The sensor value reflects a change in the infrared radiation received within the field of view. Use it as a motion sensor for an alarm system or to trigger a camera when an animal passes by. With some more advanced building and programming, the sensor can also be used to track the direction to a warm person, animal, or object.

Out of stock

Join the waitlist to be emailed when this product becomes available

SKU: NIS1070 Category:

Description

HiTechnic NXT PIR Sensor for LEGO Mindstorms NXT

Everything emits infrared radiation and the warmer something is the more radiation it emits. The HiTechnic Passive InfraRed sensor provides a reading based on thermal input (long-wavelength infrared radiation) in front of the sensor. This sensor can be used to detect when something warm enters, or moves, within its field of view. It will work with people, animals (as long as they are warm), and warm objects. The ideal temperature for the subject is 85 – 120F (30 – 50C).

The PIR sensor is only sensitive to changes in the level of thermal input. Thus if an object remains stationary in front of the sensor, the contribution of that object’s thermal radiation will slowly fade.

The PIR sensor is ideal for building robots that need to detect people or animals. For example, it can be used on an alarm system to detect when a person is entering a room or it can be used to trigger a camera when an animal walks by. If the sensor is mounted so that it can pan left and right, or fixed on a robot that turns left and right, then it can be used to locate, or even track, a warm object.

Understanding the sensor value

The field of view is divided into two zones, a left, positive, zone, and a right, negative, zone. At any given time, the sensor value is based on the relative change in the infrared radiation from these two zones. An increase in IR radiation from the left zone will have a positive effect on the sensor value while a decrease in radiation here will have a negative effect. The right, negative, zone has the opposite result on the sensor value. Here an increase in IR radiation will make the value go negative while a decrease in radiation will have a positive effect on the value. This makes it possible to not only detect when something warm moves in front of the sensor, but also the direction that the subject moved.

Let’s see what happens if someone walks in front of the sensor.

At point 1 the person is not yet in the field of view of the PIR sensor so the sensor value will be close to 0.  At point 2 the person has entered the positive left side of the sensor so the sensor value goes up. The graph goes from -128 to 127 so this value is around 60.  When the person continues to point 3 there is a dramatic drop in the sensor value, around -90.  The reason the value change is so significant is that the person has not only entered the negative zone of the sensor, but the person has also left the positive zone.  Finally, at point 4, the value returns to 0.  The reason there is a slight overshoot is that the person has left the negative zone which causes a net positive effect on the sensor value.

Note that this is a screen capture of an actual person walking in front of the sensor using a program that graphs the PIR sensor value. This program is shown below and can be downloaded. Also, note that the PIR sensor won’t actually work with a LEGO MiniFig since it only detects warm bodies such as humans and animals.

Programming the PIR Sensor

Mindstorms NXT-G PIR Sensor Block

The PIR Sensor block lets you read the sensor value as well as set the Deadband setting. The Yes/No output is the result of comparing the sensor value with the specified range. The default comparison is to check to see if the value is outside range of -10 to 10 which will be True if something warm is moving in front of the sensor. This block can either be used as a stand-alone sensor block or embedded with a standard Wait block to wait until motion is detected.

Simple Alarm Program

The easiest way to use the PIR Sensor is with a simple Wait block. In the program below the Wait block is used in a loop and has been configured to trigger when the PIR Sensor value is Outside Range of -10 to 10.

Sample PIR Graph Program

This program will graph the PIR Sensor value onto the NXT screen. Hitting the Enter button on the NXT will cause the graph to pause.

Using the PIR Sensor with NXC

Here is an NXC version of the PIR Graphing program. You can use copy/paste this into BricxCC. This program includes general purpose functions for interfacing with the sensor.

//================================================
// PIR Graph Program
// Graph the PIR Sensor value onto the NXT screen.
//
#define PIR S2

// Set the PIR Sensor Deadband.  The sensor
// has a default deadband of 12.
void SetSensorHTPIRDeadband(int port, int db)
{
  byte cmndbuf[] = {0x02, 0x41, 0};  // dev, reg
  int count;
  byte respbuf[];                    // Resp Buf

  cmndbuf[2] = db;
  count=0;
  I2CBytes(port, cmndbuf, count, respbuf);
  Wait(25);
}

// Read the HiTechnic PIR Sensor.
int SensorHTPIR(int port)
{
  int count;
  byte cmndbuf[] = {0x02, 0x42};  // dev, reg
  byte respbuf[];                 // Resp buf
  int pir;
  count=1;                        // Read 1 byte
  if (I2CBytes(port, cmndbuf, count, respbuf)) {
    pir = respbuf[0];
    if (pir >= 128) pir -= 256;
  } else {
    // No data from sensor
    pir = 0;
  }
  return pir;
}

task main()
{
  int x,y,yPrev;
  int pir;
  int yLine;

  SetSensorLowspeed(PIR);
  SetSensorHTPIRDeadband(PIR, 0);
  x = 0;
  while(true) {
    // Erase one column on all lines
    for (yLine=0;yLine<64;yLine+=8)
      TextOut(x,yLine," ");
    TextOut(0, LCD_LINE1, "+");
    TextOut(0, LCD_LINE8, "-");
    
    pir = SensorHTPIR(PIR);
    
    yPrev = y;
    y = 32 + (pir * 32)/128;
    if (x>0) LineOut(x-1,yPrev,x,y);
      
    Wait(20);
    x++; if (x>=100) x = 0;
    
    // Use Center Button pause graph
    if (ButtonPressed(BTNCENTER,0)) {
      // Wait for release
      while(ButtonPressed(BTNCENTER,0));
      // Wait for press
      until(ButtonPressed(BTNCENTER,0));
      //   and release to restart
      while(ButtonPressed(BTNCENTER,0));
      y = 0; x = 0;
      ClearScreen();
    }
  }
}

I2C Register Layout

The PIR Sensor uses an I2C device address of 0x02.

AddressTypeContents
41HbyteDeadband
42HbyteReading

The Reading field will return the currently measured PIR measurement. This value is a signed 8-bit value in the range of -128 to 127.

The Deadband field may be set from 0 to 47 to define the half-width of the deadband. The default value is 12.

The sensor element with the PIR sensor generates continuous noise. The size of the deadband is set to minimize the number of false detections which will be reported by the sensor. If the deadband value is too small, some of the noise fluctuations will exceed the deadband threshold and will appear as actual non-zero readings.

Additional information

Weight .0600 lbs
Dimensions 2 × 3 × 1.25 in

Robot C

The RobotC driver suite supports HiTechnic products for RobotC 4.x and RobotC 3.x. Select the corresponding repository at the link below and download the zip file.

https://github.com/botbench

Downloads

No downloads found!